
Red Fife Bread- Dairy Free (a soaked bread for highest nutrition and easy digestion)
November 2, 2019 • 0 comments
- Servings: 2 loafs
Directions
This recipe makes 2 loafs. I like to double the recipe- I use a convect oven and bake all 4 loafs at the same time in my Pampered Chef Stoneware Loaf Pans, this way I only need to bake bread once every 2 weeks. They freeze nicely.
INGREDIENTS
8-1/2 cups Jubilee Red Fife Flour
3 cups filtered water
2 Tbsp acidic medium (apple cider vinegar, whey, yogurt, kefir, lemon juice)
1/4 cup warm water
2 heaping tsp instant yeast
2 Tbsp cane sugar or coconut sugar
2 tsp salt
Arrowroot starch for dusting counter
Mix flour, water, & acidic medium until well incorporated. Mix it well with a spoon first. As it comes together, start working it with your hands and knead it in the bowl for about 5 minutes. You can also use a stand mixer (I only knead for 2 minutes with a mixer). Your goal is to have a nice tough piece of dough. It may seem dry and overly tough but that's what you want. Cover with plastic wrap and sit at room temperature for 18-24 hours. You need that seal to be tight so your dough doesn't dry out. I use my Pampered Chef Kitchen Spritzer to spray the plastic with oil so it seals better.
After 18-24 hours...In order to get your dough ready for the yeast, you need to warm it up a bit. To create a warm spot, turn your oven on and let it begin to pre-heat to 350 degrees for only a few minutes. Then turn it completely OFF. This will create a warm spot in your kitchen. Now place your bowl of soaked dough in your warm oven and let it warm up for about 10 minutes.
Meanwhile, mix warm water, yeast, salt and sweetener (if you don't want sugar, you can omit it completely). Let this sit for about 5 minutes then add to dough. Mix well by kneading with hands inside the bowl by folding it over and over until it's all well mixed. I have very sensitive skin on my hands and this step irritates them. I just put the dough and water/yeast/sugar/salt mixture into my stand mixer and knead for 3 minutes. Then cover the bowl with plastic wrap and let rise in your slightly warm oven for 30-45 minutes or until doubled in size.
After about 45 minutes, prepare your countertop for kneading by sprinkling a bit of arrowroot starch ona damp counter top. Why arrowroot starch instead of cornstarch or wheat flour? Simple. cornstarch is GMO (genetically modified), so no thank
you and it is also not properly prepared like so many other grains. Don't be tempted to use wheat flour as that would defeat the purpose of your soaked flour. Dump all your dough out on your dusted counter top and start kneading. The dough will be sticky at first but will toughen up a bit with kneading. Knead your dough for about 5-7 minutes. You can use a stand mixer to knead if you have one (this is my preferred method). If you're using a stand mixer, only knead for 2-3 minutes on level 2. It's important to not over knead. It takes practice to get it just right. Once you’re done kneading, let your dough rest while you grease your bread pans.
Divide dough in half and place in a greased bread pan, preferably a stone pan. Place in a warm oven (if your oven
has cooled by now, turn it back to 350 degrees for only a few minutes and turn it off). Place your loafs in the oven & let rise, uncovered, another 30-45 minutes.
After 30-45 minutes, carefully remove risen bread out of the oven and preheat the oven to 350 degrees.
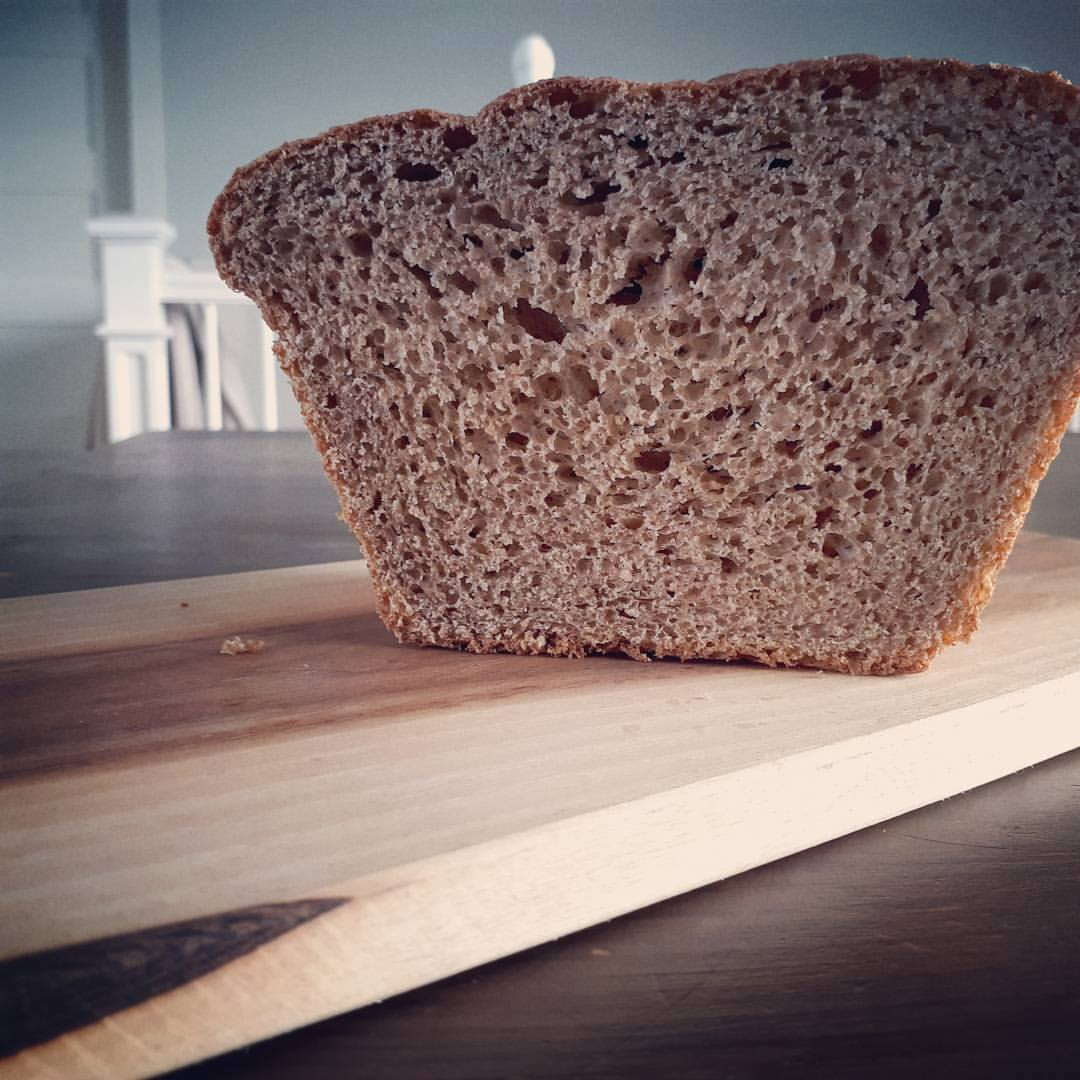
Bake the bread at 350 degrees for 40 minutes or until internal temperature reaches 180 degrees. Remove bread and let cool in pans for 5 minutes, then remove and let cool for 10-25 minutes before cutting.
Keep in mind that it may take several attempts to get your bread just right. Be patient. Experiment. Once you get it, it's so worth it! You'll have nourishing bread for your family and a skill to pass along to the next generation.


